Bow shooting tips
Bow shooting safety
Before shooting a bow, you’ll want to make sure it's safe to fire.
Bow/arrow safety check list
- Check that the string and cable are in good condition and aren’t rubbing or fraying at any point. Use bowstring wax regularly to keep your string in good condition and safe to shoot.
- Check that the cams, limbs and riser are all in good shape. Look for cracks, dents, breaks, delaminations, peeling fiberglass, and any mechanical parts that may be defective. If any part of the bow is suspect, don’t shoot it. Fix it or take it to an archery shop to have it checked out.
- Don’t wear loose fitting clothes when shooting a bow. Loose clothes can get caught up in different parts of the bow.
- Wear an arm guard to protect your forearm from the bowstring when it’s released.
- If you’re using a release, make sure it’s working properly. Don’t draw a compound bow with your fingers. This can rotate the string possibly making it come out of a wheel or cam, which can be very dangerous.
- Store and transport your bow in a bow case – preferably a hard one – and all arrows in a sturdy case or quiver. Make sure your broadheads are safely covered.
- Regularly check arrows for nicks, splits and fragments. Arrows leave the bow under very high pressure and a weakened arrow can cause serious injury. When in doubt, don't shoot a questionable arrow.
- Never dry-fire a bow – drawing and releasing the string without a nocked arrow.
- Make sure your arrows match the draw weight of your bow. A mismatch can result in serious injury.
Hunting safety in the field
In addition to making sure your bow and arrows are safe to shoot, make sure you're handling them safely in the field.
- Only nock an arrow when it’s safe to shoot, and be sure to always point the arrow in a safe direction.
- Take the time to make sure of your target before you shoot, and take note of what’s in front of and behind your target. Don’t shoot over a ridge if you can’t see what’s on the other side.
- Never shoot into thick brush -- arrows can ricochet. Also, never shoot an arrow straight up in the air.
There are archery-related injuries every year but you can avoid them by following the rules above and using a bit of common sense.
Where to practice shooting a bow
Practice shooting your bow regularly and you’ll develop the form and muscle memory you need to shoot accurately and confidently.
Places to shoot from the backyard to the backcountry
You can practice your shooting anywhere it’s safe and outside of urban growth boundaries. It's also illegal to shoot in the direction of any person, building, structure or vehicle within the range of your bow. So be sure there's y a clear line of sight between you and the target, and a safe backstop.
Possible locations include:
- A large backyard in a rural setting
- Archery specific indoor and outdoor target ranges
- Informal locations or ranges on public lands
Backyard range
If you have roomy property in a rural setting, there’s no reason you can’t practice shooting there. It helps that most turkey shots will be within 20 yards, a reasonable-size backyard. Make sure you have a decent-size target, an even larger backstop and no structures or animals behind the target.
Outdoor archery ranges
The Oregon Department of Fish and Wildlife has set up outdoor practice ranges at EE Wilson near Corvallis and Junction City Pond near Eugene.
In addition, bow and archery associations may be able to help you find nearby archery ranges. You’ll find lots of helpful information on their websites:
- Oregon Hunters Association: https://oregonhunters.org/
- Oregon Bowhunters: http://www.oregonbowhunters.com/
- National Field Archery Association: https://www.nfaausa.com
- Archery 360: https://www.archery360.com/
Indoor archery ranges
The same associations listed above may be able to steer you toward indoor ranges, as well. Indoor ranges will be particularly helpful getting ready for spring turkey season. Late winter and early spring weather can make practicing outside difficult and uncomfortable.
In addition, many archery pro shops and larger sporting goods stores have indoor ranges, and some may let you come in and practice. They also routinely hold shooting events for both kids and adults. Informal shooting events are a great way to enjoy shooting and comradery at the same time.
Shooting at a local pro shop or sporting goods store also gives you a chance to establish a relationship with an archery professional in your area – an especially good thing if you’re new to bowhunting. Pros can help you select an appropriate bow, set you up with the right arrows and other gear, and help you tune and maintain your bow.
Shooting on Oregon’s public lands
Oregon is blessed with hundreds of thousands of acres of public land, much of it accessible to hunters and archers. If you’re practicing on public land, make sure you’re shooting well off the road and into a safe backdrop.
Also, be respectful of our wild places and the other people who visit them. Haul off any targets you brought with you (or that were left by someone else) and pick up any trash in the area.
Archery range rules
There are basic rules of safety and etiquette that apply at archery ranges. Be sure you’re following them.
Etiquette on the range
Etiquette is an important part of a fun, positive and safe experience on the archery range. Proper range etiquette starts with safety, for you and others around you.
- Keep arrows pointed down range.
- Give fellow shooters plenty of space, and never cross into their shooting lane with your body or equipment.
- Pay attention to what’s going on around you, especially when leaving or entering the shooting line.
- Straddle the shooting line -- one foot on each side -- when shooting.
- Shoot as many arrows as those around you to minimize wait times between shooting and retrieving.
- Once you’ve shot all your arrows, step back from the shooting line, place your bow on the rack and wait.
- When everyone has completed the round ask “Clear?” and wait for a response before walking downrange to retrieve your arrows.
- If you hear someone ask “Clear?" take a look around at other archers. If everyone is done shooting, respond “Clear” and move down range to retrieve arrows.
- When pulling arrows, make sure no one is standing behind you.
- Be supportive of fellow archers.
Rules of the range
In addition to specific rules related to the range your shooting at, there are some universal practices that help maintain a safe practice environment.
- Know and obey the range rules.
- Inspect your equipment prior to shooting.
- Always walk, don't run, on the range.
- Only shoot a bow with an arrow properly nocked. To shoot without an arrow is called a dry fire.
- Keep arrows in the quiver until ready to shoot.
- Keep arrows pointed down or towards the target.
- Shoot only the targets in your lane.
- Be certain your line of fire is clear.
- Only walk down range when it is clear to do so.
- Stand on the same shooting line as other archers, not in front of or behind them.
Knowing and abiding by archery range etiquette and rules ensures a safe, enjoyable experience for everyone.
Proper archery shooting stance
Shooting accurately starts with the proper form, and that begins with a good stance. From your feet up through your hips and torso, a solid foundation in your lower body will improve your shooting.
Start with an open stance
The “open” stance is a good one for beginners. It’s easy to master and to practice consistently.
An open stance positions yours hips and shoulders in-line with the direction you’re shooting. This perpendicular setup to the target is simple to do.
First, place one foot on each side of the shooting line. Most ranges will have these lines. If not, create your own using tape, a low-profile rod, a section of rope, a broomstick, or even a practice arrow to align your shooting position with the target.
The foot on the side of your bow arm, the arm that holds the bow up while you're shooting, will be in front of the line (toward the target). We'll call this your front foot.
Stand with your feet shoulder width apart and parallel to the shooting line. Move your front foot backwards about 2 inches and turn it 45° towards the target.
Stand up straight, and rotate your chin so it’s over the shoulder of your bow arm.
Next, flatten your back by moving your hips forward so they are tucked under the upper body. This will optimize stability by relaxing the back, aligning the spine, and engaging your core.
Lower your ribs, chest and shoulders forward toward your stomach. Think of pushing your shoulders slightly down and forward. This will further engage your core.
These same principles, minus the foot placement, will apply if you’re seated in a ground blind for turkey hunting.
The goal is to shoot with a straight back and a fully engaged core in order to maximize stability and develop a consistent stance.
As you shoot more, you’ll find yourself making minor adjustments to your stance, such as widening or narrowing your feet. That’s fine. But once you find the stance that works for you, be as consistent with it as you can.
Gripping and shooting a bow
To be an accurate shooter, it’s important to develop a consistent grip and draw.
One of the most common mistakes bowhunters make is tensing up and gripping the bow too firmly. A firm grip will torque the bow, or send it out of alignment, resulting in a poor shot and perhaps a painful slap on your arm from the bow string.
Develop a consistent grip
The grip of the bow should rest on the pad of your thumb and should not cross the lifeline of your hand. With the bow in this position, your fingers will be off to the side of the riser at a slight angle.
Keep your fingers relaxed, not extended, to help relax your muscles and keep your grip loose. This will also save your fingers from getting cut by a broadhead. Use a wrist sling so you won’t be worrying about the bow jumping out of your hand as you shoot.
As you begin practicing, concentrate on gripping the bow the same way, in the same place, every time you shoot.
Draw the bow smoothly
Once you’ve settled into your stance and gripped your bow, you’re ready to shoot.
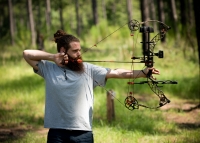
Begin by nocking an arrow and then connecting the release onto the D-loop. Raise both arms up to shoulder level and draw the bow back.
Keep the arrow pointed at the target at all times. Drawing a bow should be a smooth, consistent motion. If you can’t pull the bow back without jerking it, reduce your draw weight to continue shooting safely.
Once you reach full draw – the point where you can’t pull the bow back any farther – anchor your hand, and the release and string in a comfortable position along your jaw and cheek with the bow string touching the tip of your nose. To shoot consistently, this anchor point should be the same every time you shoot.
Next, acquire the target through your peep with the entire sight frame visible. Center the proper sight pin for the distance you’re shooting, and place our pointer finger over the trigger without pulling it. When ready, apply gentle pressure to the release trigger. Don’t jerk or punch the trigger of your release. The release should be a smooth, relaxed movement.
Often times shooters refer to the shot “surprising them” when an arrow is released. This happens when the shooter is concentrating on holding the sight pin steady on the target, and applying smooth, consistent pressure on the release trigger until the bow fires.
Follow through after the shot
Once your bow fires, a good follow through will keep everything aligned so the arrow flies true. Once you release the trigger, your release hand should be pulled over the top of your shoulder. This keeps the string on a straight path, sending the arrow downrange with optimum accuracy.
As you practice, concentrate on developing a consistent stance, grip, draw, release and follow through for every shot. This consistency is key to accurate shooting.
Practical Practice
Shooting a target while standing up at the range is a lot different from shooting a turkey while sitting in a ground blind. When practicing for a hunting trip, recreate your shooting scenario. Whether it will be standing, sitting, kneeling, and in or out of a ground blind.
Shooting a turkey
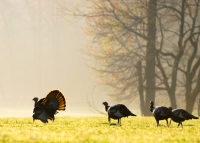
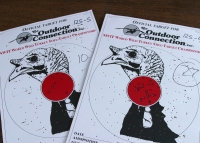
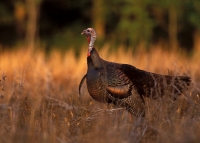
There’s no substitute for practicing in conditions that closely resemble those you’ll be hunting in, and this is especially true for bowhunters looking to bag a turkey. Turkeys are nervous birds with very small kill zones, so accurate shot placement is critical for getting a quick, clean kill.
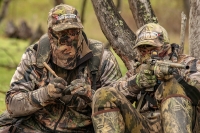
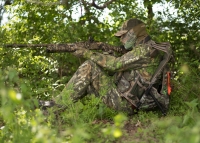
Most bowhunters like to hunt turkey from a ground blind to avoid spooking birds as they draw their bows. Some hunters like to kneel in the blind to shoot, but most like to sit on some kind of chair. This can range from an overturned milk carton with a cushion on it, to a specially designed blind chair. Avoid chairs with arms that can restrict your drawing movement.
When hunting, you’ll rarely need to set a decoy more than five yards from your ground blind. Ten yards max. Five yards may seem very close. But while turkeys have excellent vision, they have lousy depth perception and often walk right up to your ground blind.
Simulating a turkey hunt
To practice shooting in a hunting environment, set up your ground blind and place a 3-D turkey target five yards away.
Experiment with different shot angles and shooting out different windows of the blind. Use arrows the same size and weight as the ones you would use hunting. You can practice with your hunting broadheads, or replace the broadheads with similarly weighted target tips.
Practice follow up shots as well. If you’ve wounded the bird, you may have to step out of the blind and take a second, longer shot. Practice getting out of your chair and out of the blind quickly and smoothly.
Step outside your blind and take several standing shots at a target 50 yards away, or your farthest sight pin.
This kind of real life practice will be invaluable on your actual turkey hunt.

