How to clean gaper clams
The Oregon Health Authority has issued an advisory for recreationally harvested softshell and gaper clams along the Oregon coast due to arsenic contamination. Visit healthoregon.ogr/fishadv to lean more, including shellfish cleaning guidelines that reduce your exposure.

Steps to processing gaper clams
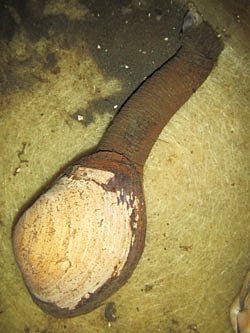
Step 1 - Start with a whole live clam
Start cleaning on live clams. Some may put in freshwater overnight, but we recommend this method.
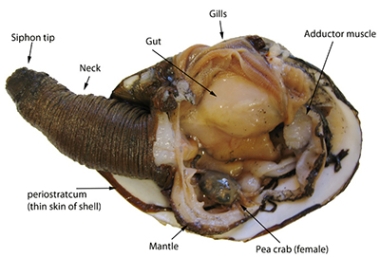
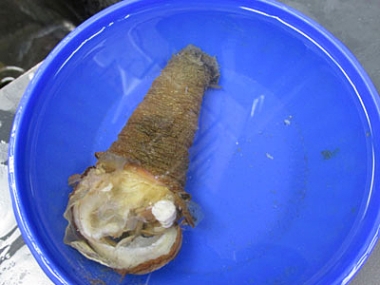
Gaper clams have a long siphon (or neck) that can partly retract into their shell.
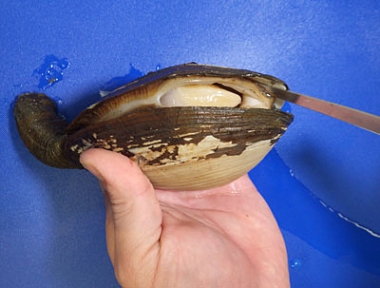
Step 2 - Insert knife and cut adductor muscles
The first step in cleaning a gaper clam is to slip a thin knife along the edge of the shell to cut the two adductor muscles that hold the two shells together.
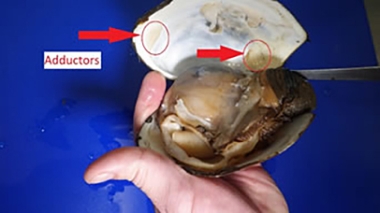
Step 3 - Cut adductor muscles
Cut each of the two adductor muscles where they are attached to the shell, and gently pull away the whole clam body.
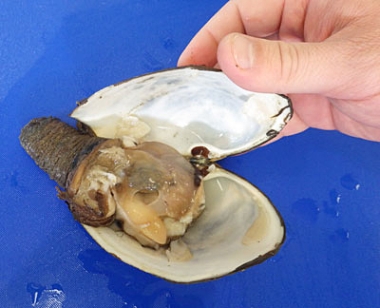
Step 4 - Fully shucked clam
The fully shucked clam body can now be pulled from the shell.
A close look at gaper anatomy, including a female pea crab, almost always found in the mantle of gaper clams and typically accompanied by a male (smaller)
Step 5 - Cut off the neck and mantle
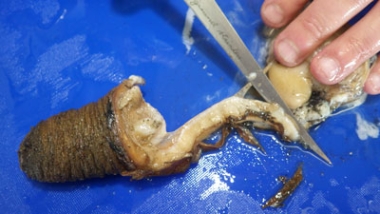
Cut off the neck and mantle and separate from the clam body.
Step 6 - Cut off foot, discard guts
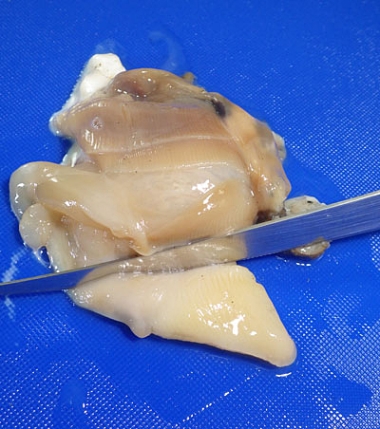
The remaining clam body is made up of the gut, the gills, and the digger foot. Only the triangular, muscular digger foot is usually retained, and the gut and gills are discarded.
Another thing you can do is thumb them out if cooking whole.
Step 7 - Prepare neck for skin removal
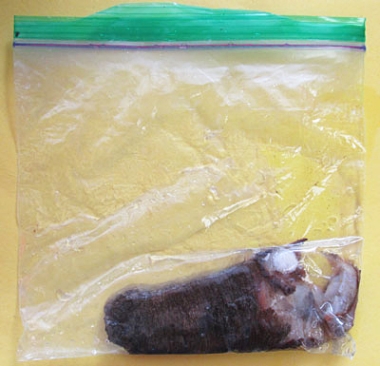
The tough brown skin on the neck and mantle tissue requires special attention as it is difficult to remove from freshly cleaned clams. There are several techniques but the two that we recommend are the cold water soak and the freezing method. The cold water soak method is simply allowing the neck and mantle tissues to soak in cold freshwater (in a bag or bowl) for 4+ hours for the muscle tissue to relax. The freezing method is placing the necks into a freezer bag, and freezing and defrosting them later.
Step 8 - Remove neck skin and cut siphon tip off
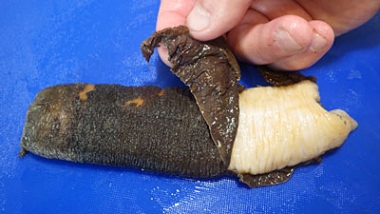
After using either the cold water soak or freezing method, the tough brown skin can easily be peeled.
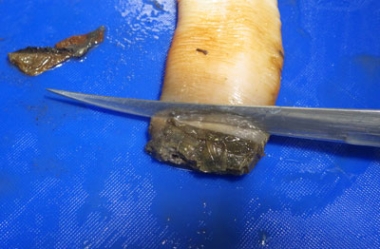
The tough siphon tips should also be cut and removed.
Step 9 - Finished product
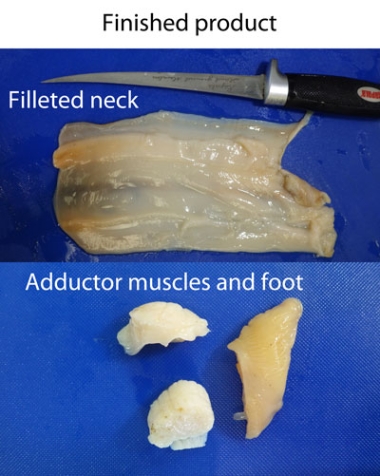
After discarding guts and gills, the finished product should be the filleted neck, adductor muscles and foot.
The clam meat is now ready for your favorite recipe.

