

12 tips for better wildlife photos
Always have your camera with you, explore your backyard and 10 more pro tips.
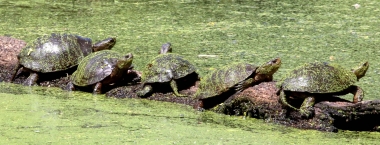
Oregon is home to more than 250 species of animals – from backyard birds to mountain mammals -- making it a perfect place to practice your wildlife photography skills.
Keith Kohl, ODFW wildlife area operations manager, is an avid and accomplished wildlife photographer. Here are his tips for getting the most from your wildlife photographs:
1) Always have your camera with you.
When you’re out hiking, camping, biking, kayaking, be sure to pack a camera. Some wildlife shots happen because of careful planning, but many others just happen. If you don’t have a camera with you, you can’t capture these unexpected moments.
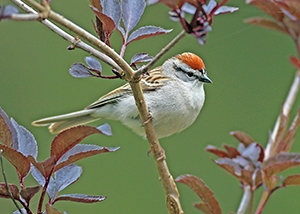
2) Make the most of your backyard bird photos.
Set out a variety of foods to attract a variety of birds, and select bird feeders with perches that mimic the natural environment.
3) Start with the equipment you have and learn how to get the most out of it.
Yes, professional wildlife photographers invest in expensive cameras and mega-lenses, but you can still take great photos with even entry-level gear. It’s more about good technique than having the longest lens.
It you decide to invest in new gear, spend your money on quality lenses. Good optics will have a bigger impact on your photos than will incremental increases in the number of pixels your camera records.
Camera bodies are like computers – there’s always a new and better one coming along. Lenses stand the test of time and good ones will outlive several camera bodies.
4) Scout photographic opportunities the same way a hunter would scout a hunt.
- Know the animals you’re likely to encounter. What time of day are the active? If they’re migratory, what time of year are they here? Are they likely to be singles (telephoto lens) or in a flock (wide angle lens)?
- Position yourself to take advantage of the light. Where will the sun be – what direction, how high – when animals are most likely to be around.
- Check the tides if you’re photographing on the coast. Low tides will reveal tide pools, high tides can drive sea birds up on the rocks.
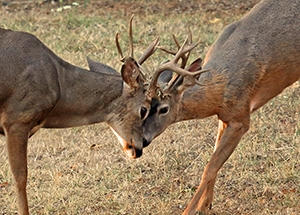
Do some scouting to learn about animal behavior and timing.
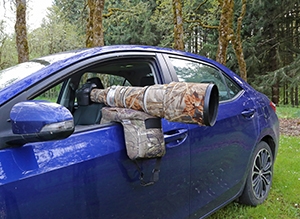
5) Use your vehicle as a blind.
Your vehicle will help hide any movement and scent, and many birds and animals will get used to a car or truck being there. Arrive at your location early (here’s where scouting will pay off), set up and wait for your subjects to arrive.
A great tool for your “vehicle blind” is a camera bean bag that fits over the door frame and supports your lens and camera.
6) Don’t chase or harass wildlife.
Let them come to you. Unless you get lucky, your chances of sneaking up on an animal are pretty slim.
Instead, arrive early at a likely viewing spot and set up in a blind. It could be a portable blind, a permanent structure, or even your car.
7) Learn some photographic basics.
Even if you normally shoot in the “auto” mode, understanding the impact shutter speed, aperture and ISO can have on your photos will help you select the best “auto” mode for the conditions you’re shooting in.
If you’ve set your camera for special conditions – stop action, low light, etc. – be sure to return your camera to mid-range settings (ISO, etc.) when you’re done. If you keep these mid-range settings consistent, you’ll already know what your camera set for when you need to grab a quick shot.
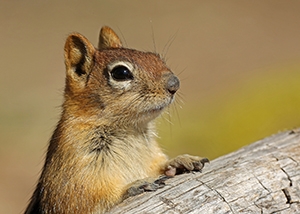
8) Make sure the eye's in focus.
A viewer’s gaze is drawn to an animal’s eye(s), so if there’s only one element in your photograph that’s in focus make it the eye(s).
9) Shoot when and where the light is best.
- The half hour after sunrise and the half hour before sunset is called the “golden hour.” This is when daylight is softer and shadows are less harsh than when the sun is higher in the sky. Not only can the skies be more dramatic during the golden hour, but it’s often easier to meter and get the proper exposure.
Coincidentally, animals often are most active near sunrise and sunset.
- Keep the sun over you back when shooting in full sun. Sometimes you don’t have a choice as to when you get to take a shot – you’re just driving through, or you overslept and missed the golden hour. In these cases, compose your shot with the sun behind you to minimize awkward shadows on your subject.
10) Learn from your mistakes.
As a guide, plan on deleting 10 times as many shots as you keep. But before you hit the delete button, take a moment to think about why the shot didn’t work.
- Was a key element out of focus?
- Was the composition wonky?
- Was the image underexposed/overexposed?
11) Set up a system to manage your photos
The sooner the better you do this the better. Digital photography makes it easy to take lots (and lots) of photos. So many, in fact, it can be hard to find anything. Good photo management can be a two-stage process:
- Periodically delete your “mistakes” from your camera. Take a few minutes throughout the day to delete unwanted images and you’ll have fewer to download later. And, it will help free up room on your memory card.
- Set up a computerized “file system” that makes it easy for you to store and retrieve photos. There are many ways to do this (including photo management software). What’s important is to create a system that works for and that you will use.
12) Ditch the calendar.
Wildlife photography is a year-round activity with each season bringing new photographic opportunities
- In spring, many bird species are migrating through Oregon on their way to breeding grounds in the north. Hibernating animals – from bears to tree frogs – are emerging and active in the landscape. And cute, photogenic wildlife babies are being born.
- Summer brings longer days and access to high elevation areas.
- The colorful foliage of fall can offer a dramatic backdrop for wildlife.
- Even winter brings photographic subjects like the huge flocks of waterfowl arriving in many parts of the state.
Don't forget to send your photos to ODFW and you may see them on the MyODFW.com webpage, in social media, or on signs and publications.
All photos by Keith Kohl.

Visit the Recreation Report
Current bird and wildlife viewing opportunities. Updated weekly by wildlife biologists throughout the state.